 Recently I needed to monitor the free disk space on some Linux VMs on Azure. Each VM had a different VM size, which means different OS Disk size, Temp partition size, etc. In addition, some VMs had an extra Data disk, while some others did not. The aim was to monitor and create alerts for each partition separately. This is something that Azure does not offer out of the box. Instead, it requires some extra effort to achieve this. Since I realized that there is actually not good enough documentation on the net, I decided to share my experience hoping that it will be helpful for others too.
The good thing is that Azure provides an extension for such purposes, which is called “Linux Diagnostic Extension”, known also as LAD (don’t ask me why LAD and not LDE). The version provided out of the box in Azure portal is 2.3 .However, the metrics provided by this version are very limited in comparison to the newer 3.0 version. So, the first step is to upgrade to version 3.0 .
The 3.0 version cannot be installed using Azure portal. Instead, one has to use Azure CLI 2.0 for this purpose. However, even after you upgrade to 3.0 you still don’t have detailed metrics for each separate partition in your Linux VM. All you get is an aggregated metric for the sum of your partitions. This is very frustrating, since what is needed in most situations is a value of free or used space for each partition separately and not for the sum of all of them. Microsoft provides some information on how to create custom metrics, but it seems that it does not help much on this task. This is why I created this guide.
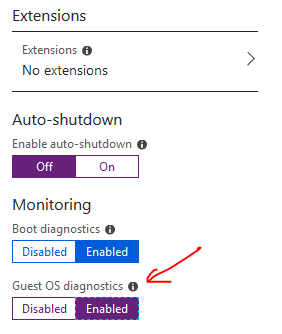
So, let’s start by creating a new Linux VM on Azure. Chose a VM name, credentials, etc as you wish until you reach the third step where you are asked about VM Settings. Make sure you enable Guest OS diagnostics. This will install LAD 2.3, which we will later upgrade to 3.0 .

After the machine is created go to the Extension blade, where you should see the LAD 2.3 extension.
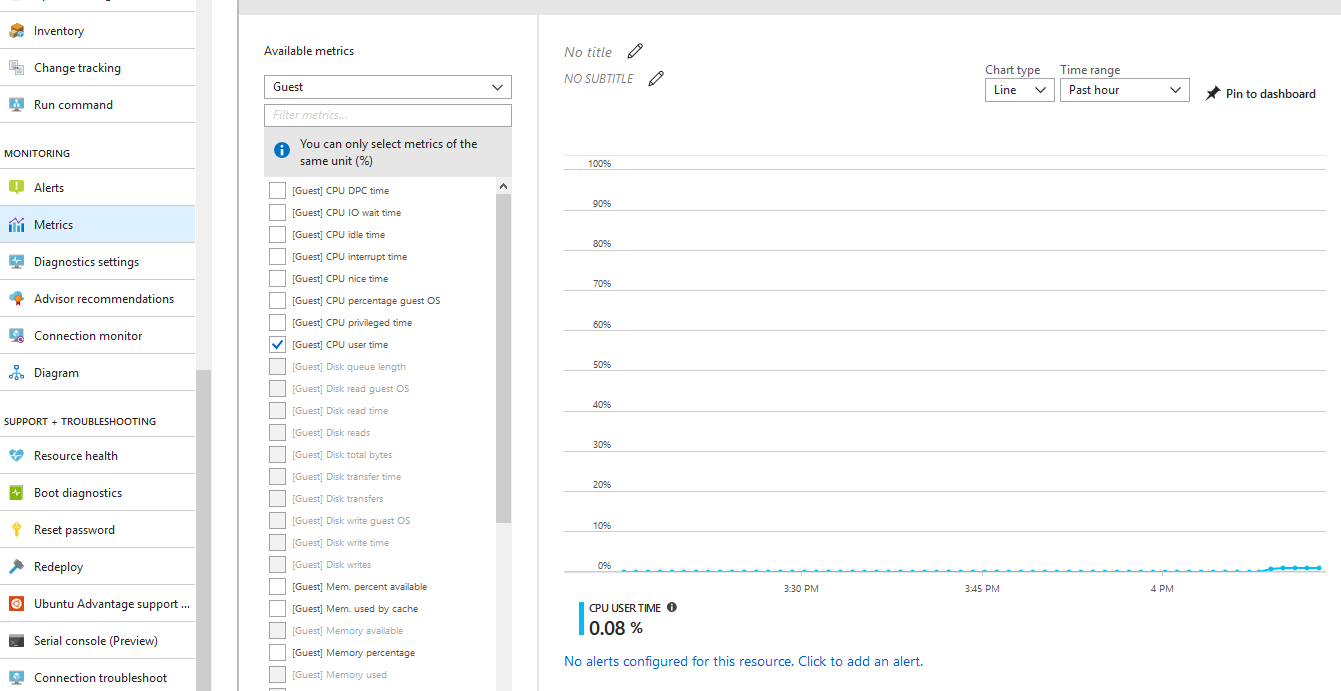
On the Metrics blade of the VM you should be able to see all the available Guest metrics. As you can figure out, there are very few metrics and none about the filesystem usage.
Now, to upgrade to LAD 3.0 you have to use a Linux machine where you must install Azure CLI 2.0 . Since our VM is already a Linux machine we can use this for this purpose. However, you can use any other Linux machine you have available, whether it is an Azure VM, local VM or a physical machine. The instruction to install Azure CLI 2.0 are very clear and straight forward and can be found on this link.
After you have installed Azure CLI 2.0 you can proceed with LAD upgrade to 3.0 . First, download the sample configuration using the following command:
wget https://raw.githubusercontent.com/Azure/azure-linux-extensions/master/Diagnostic/tests/lad_2_3_compatible_portal_pub_settings.json -O portal_public_settings.json
Then edit the downloaded file and add only the highlighted lines (15-70) below, as the rest of the lines are here only to help you locate the correct position in the file.
          {
            "annotation": [
              {
                "displayName": "Filesystem free space",
                "locale": "en-us"
              }
            ],
            "class": "filesystem",
            "condition": "IsAggregate=TRUE",
            "counter": "freespace",
            "counterSpecifier": "/builtin/filesystem/freespace",
            "type": "builtin",
            "unit": "Bytes"
          },
          {
            "annotation": [
              {
                "displayName": "OS Filesystem free space",
                "locale": "en-us"
              }
            ],
            "class": "filesystem",
            "condition": 'Name="/"',
            "counter": "freespace",
            "counterSpecifier": "/builtin/filesystem/freespace(/)",
            "type": "builtin",
            "unit": "Bytes"
          },
          {
            "annotation": [
              {
                "displayName": "OS Filesystem % free space",
                "locale": "en-us"
              }
            ],
            "class": "filesystem",
            "condition": 'Name="/"',
            "counter": "percentfreespace",
            "counterSpecifier": "/builtin/filesystem/percentfreespace(/)",
            "type": "builtin",
            "unit": "Percent"
          },
          {
            "annotation": [
              {
                "displayName": "Temp Filesystem free space",
                "locale": "en-us"
              }
            ],
            "class": "filesystem",
            "condition": 'Name="/mnt"',
            "counter": "freespace",
            "counterSpecifier": "/builtin/filesystem/freespace(/mnt)",
            "type": "builtin",
            "unit": "Bytes"
          },
          {
            "annotation": [
              {
                "displayName": "Temp Filesystem % free space",
                "locale": "en-us"
              }
            ],
            "class": "filesystem",
            "condition": 'Name="/mnt"',
            "counter": "percentfreespace",
            "counterSpecifier": "/builtin/filesystem/percentfreespace(/mnt)",
            "type": "builtin",
            "unit": "Percent"
          },
          {
            "annotation": [
              {
                "displayName": "Filesystem % free inodes",
                "locale": "en-us"
              }
            ],
            "class": "filesystem",
            "condition": "IsAggregate=TRUE",
            "counter": "percentfreeinodes",
            "counterSpecifier": "/builtin/filesystem/percentfreeinodes",
            "type": "builtin",
            "unit": "Percent"
          },
Now create the following script, providing the correct values to the parameters my_resource_group, my_linux_vm, my_diagnostic_storage_account and your_azure_subscription_id (see highlighted lines).
# Set your Azure VM diagnostic parameters correctly below
my_resource_group=<your_azure_resource_group_name_containing_your_azure_linux_vm>
my_linux_vm=<your_azure_linux_vm_name>
my_diagnostic_storage_account=<your_azure_storage_account_for_storing_vm_diagnostic_data>

# Should login to Azure first before anything else
az login

# Select the subscription containing the storage account
az account set --subscription <your_azure_subscription_id>

# Download the sample Public settings. (You could also use curl or any web browser)
##wget https://raw.githubusercontent.com/Azure/azure-linux-extensions/master/Diagnostic/tests/lad_2_3_compatible_portal_pub_settings.json -O portal_public_settings.json

# Build the VM resource ID. Replace storage account name and resource ID in the public settings.
my_vm_resource_id=$(az vm show -g $my_resource_group -n $my_linux_vm --query "id" -o tsv)
sed -i "s#__DIAGNOSTIC_STORAGE_ACCOUNT__#$my_diagnostic_storage_account#g" portal_public_settings.json
sed -i "s#__VM_RESOURCE_ID__#$my_vm_resource_id#g" portal_public_settings.json

# Build the protected settings (storage account SAS token)
my_diagnostic_storage_account_sastoken=$(az storage account generate-sas --account-name $my_diagnostic_storage_account --expiry 2037-12-31T23:59:00Z --permissions wlacu --resource-types co --services bt -o tsv)
my_lad_protected_settings="{'storageAccountName': '$my_diagnostic_storage_account', 'storageAccountSasToken': '$my_diagnostic_storage_account_sastoken'}"

# Finallly tell Azure to install and enable the extension
az vm extension set --publisher Microsoft.Azure.Diagnostics --name LinuxDiagnostic --version 3.0 --resource-group $my_resource_group --vm-name $my_linux_vm --protected-settings "${my_lad_protected_settings}" --settings portal_public_settings.json
After you save the file, make it executable (chmod 755 installLad3.0.sh) and run it. You will be asked to visit a URL and enter a security code. Do it from any computer you like. You will be also asked to login with your Azure portal credentials. After you do so, close the browser window and return to your Linux machine where you executed the script. Be patient and allow the script to run for as long as required. On some high specs VM it may require less than a minute, but on some low end VMs or very busy ones, it may take much more. In one occasion I had to wait for about half an hour, but in the end the script run successfully and exited normally.
So, I suppose at this point you have already run your script successfully. Now go to the Azure portal and check the extensions. You should see the LinuxDiagnostic extension at version 3.* .
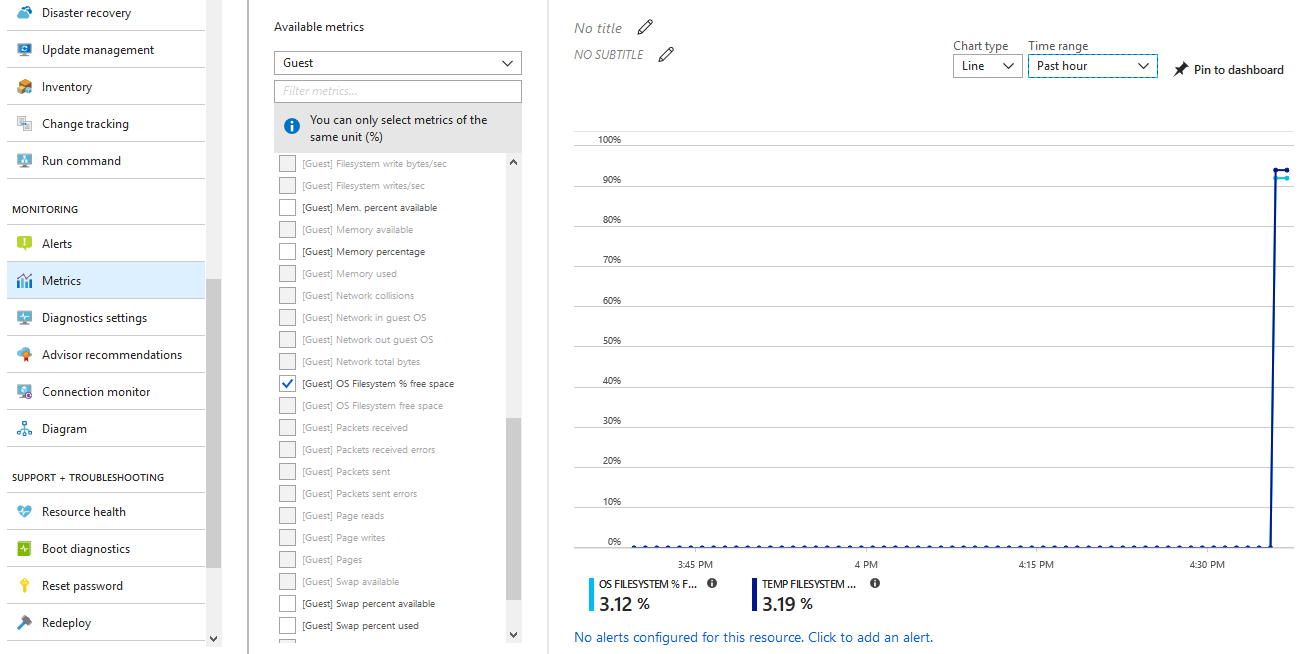
At the Metrics blade you should now see many more options for the Guest metrics. Among them, your custom metrics for the volumes’ free space.
Based on these metrics you can create alerts as needed.
Please leave a comment to let me know how this guide worked for you.
Enjoy!


It is truly a nice and helpful piece of information. I am glad that you simply shared this helpful syntax with us. And also thank you for your detailed explain.
After I enabled the Guest Level monitoring, the installed version of LAD is already at 3.*. I am having trouble figuring out what config file do I edit to add the “Temp Filesystem % Free Space”. One config I tried modifying is on /var/lib/waagent/Microsoft.Azure.Diagnostics.LinuxDiagnostic-3.0.135/config/0.settings and 1.settings
But to no avail.
After enabling the Guest Level monitoring, the LAD version is already at 3.*. I am having trouble finding the config that I can modify to add the “Temp Filesystem Free space”, tried modifying /var/lib/waagent/Microsoft.Azure.Diagnostics.LinuxDiagnostic-3.0.135/config/0.settings and 1.settings but to no avail.
Hi driggs! First, just to let you know that LAD is currently at v.4.0 . However, currently the default version for new VMs is 3.0. If the VMs are not very old, they should probably be already on 3.0 . To update the configuration while remaining at the same version, you just have to follow the same procedure as when you upgrade from 2.x to 3.0 . This will update the 3.0 configuration with the custom one that you provided with following the instructions on this post. Actually Microsoft also mentions this on the following link: https://docs.microsoft.com/en-us/azure/virtual-machines/extensions/diagnostics-linux-v3#update-the-extension-settings
From the article:
Update the extension settings
After you change your protected or public settings, deploy them to the VM by running the same command. If the settings changed, the updates are sent to the extension. LAD reloads the configuration and restarts itself.